Tags
Tagging items for filtering in your shop.
Tags are currently set to help filter items in your shop for customers. Given the example below, we can see what this looks like from the administrative (configuration) side and what the customer would see.
Assigning Tags
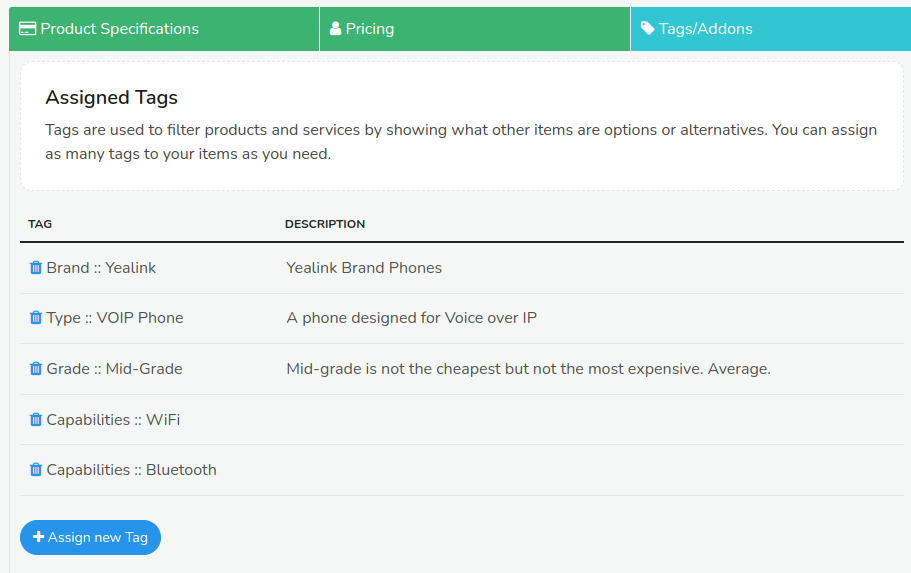
When creating a product or service, you can select from a list of available tags in that category, and then have them shown in the shop. Tags can be just generic tags, or filter tags. In the above example, all of the tags are filter tags which means they will be rendered in the left side of the customer view.
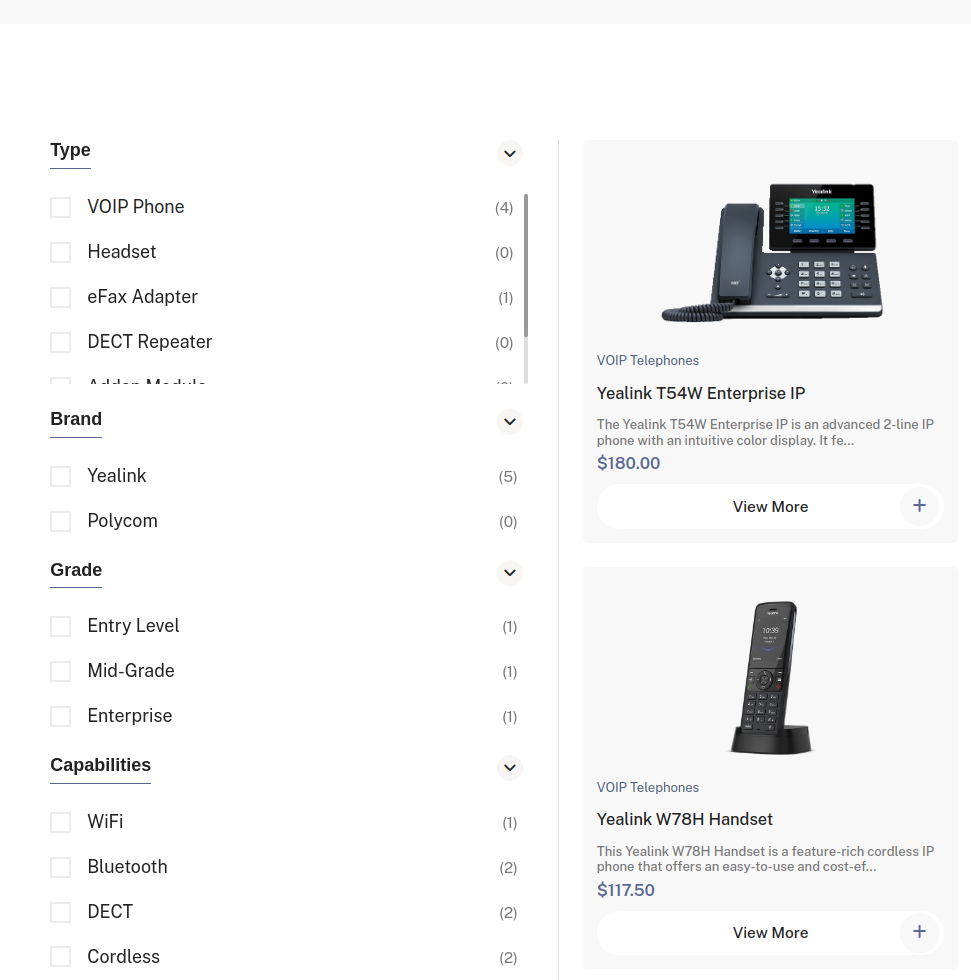
As you can see the tags that we selected in the product area, now are used as filterable categories. Any product or service that has this tag will be filterable on the left side for the customer to sort their product view.
Creating a Tag Category
To create a tag, select the Product or Service category sections. Click the Tags link next to the category name.
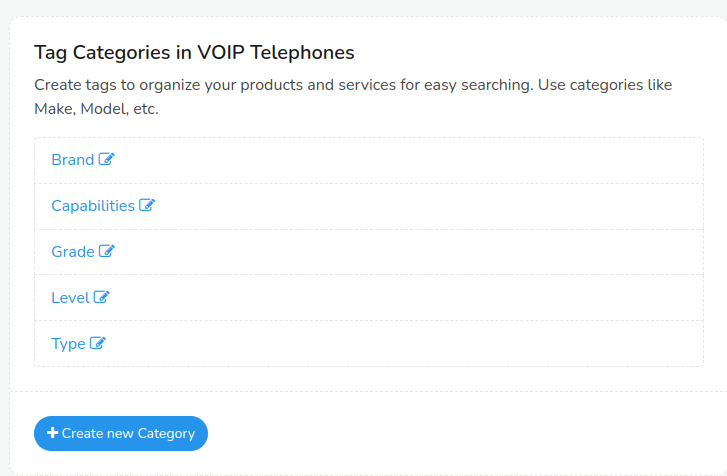
Click Create new Category
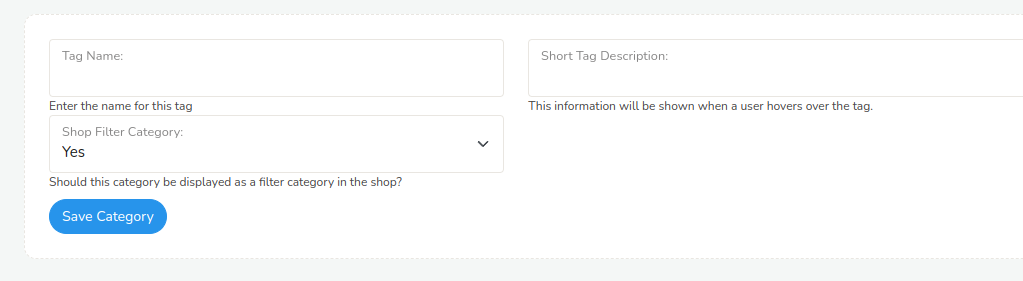
Enter the Tag Name and a Short Tag Description. The description is currently not used for the customer at this time.
If this is an information tag, select No for the Shop Filter Category question. If you wish for this to be a filterable tag, where Logic will only show products that have this tag when clicking on the checkbox, then select Yes.
Click Save Category
Creating a Tag
After selecting a tag category, you can click Create New {category} Tag
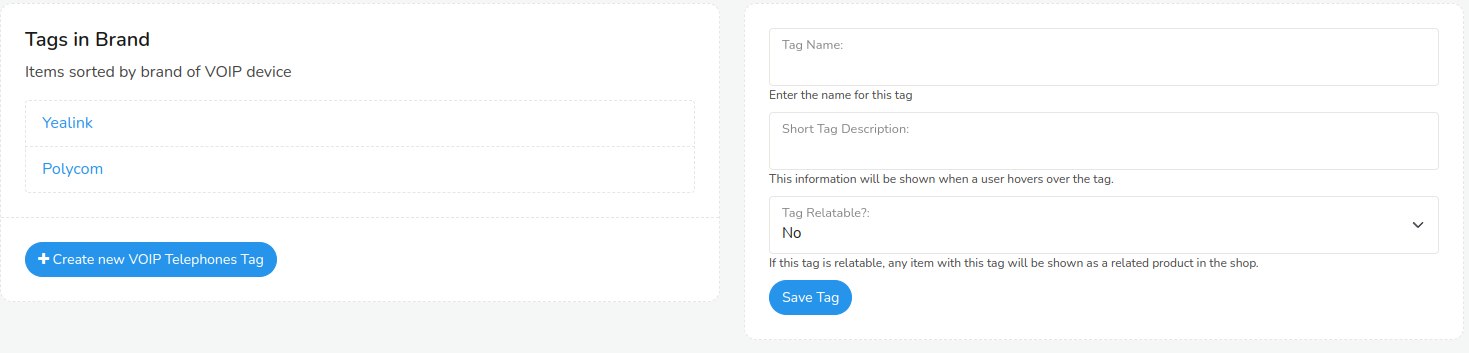
Enter the Tag Name, and Short Tag Description
If you wish to make this tag "relatable", meaning when someone selects this product, if any other products have this same tag, it will be shown underneath the product for the customer under the heading Related Items.
Click Save Tag
After you have completed these steps, you can go into the product or service, and assign the tag.
Updated over 3 years ago